How To Create User Flows
How to create user flows in an easy way
Create a user flow that's clear and understandable can be a pretty hard task. Let's see some methods to help you do it effectively.
![]()
Creating and explaining the user flow is an important phase of the product design process.
The user flow technique helps us understand the flow of how users interact with our application. The user flow can be demonstrated in a meeting, in a call, or in a design handoff process. It helps us communicate that information to the developers, QA testers, and product managers so they will have a clearer understanding of the solution we offer.
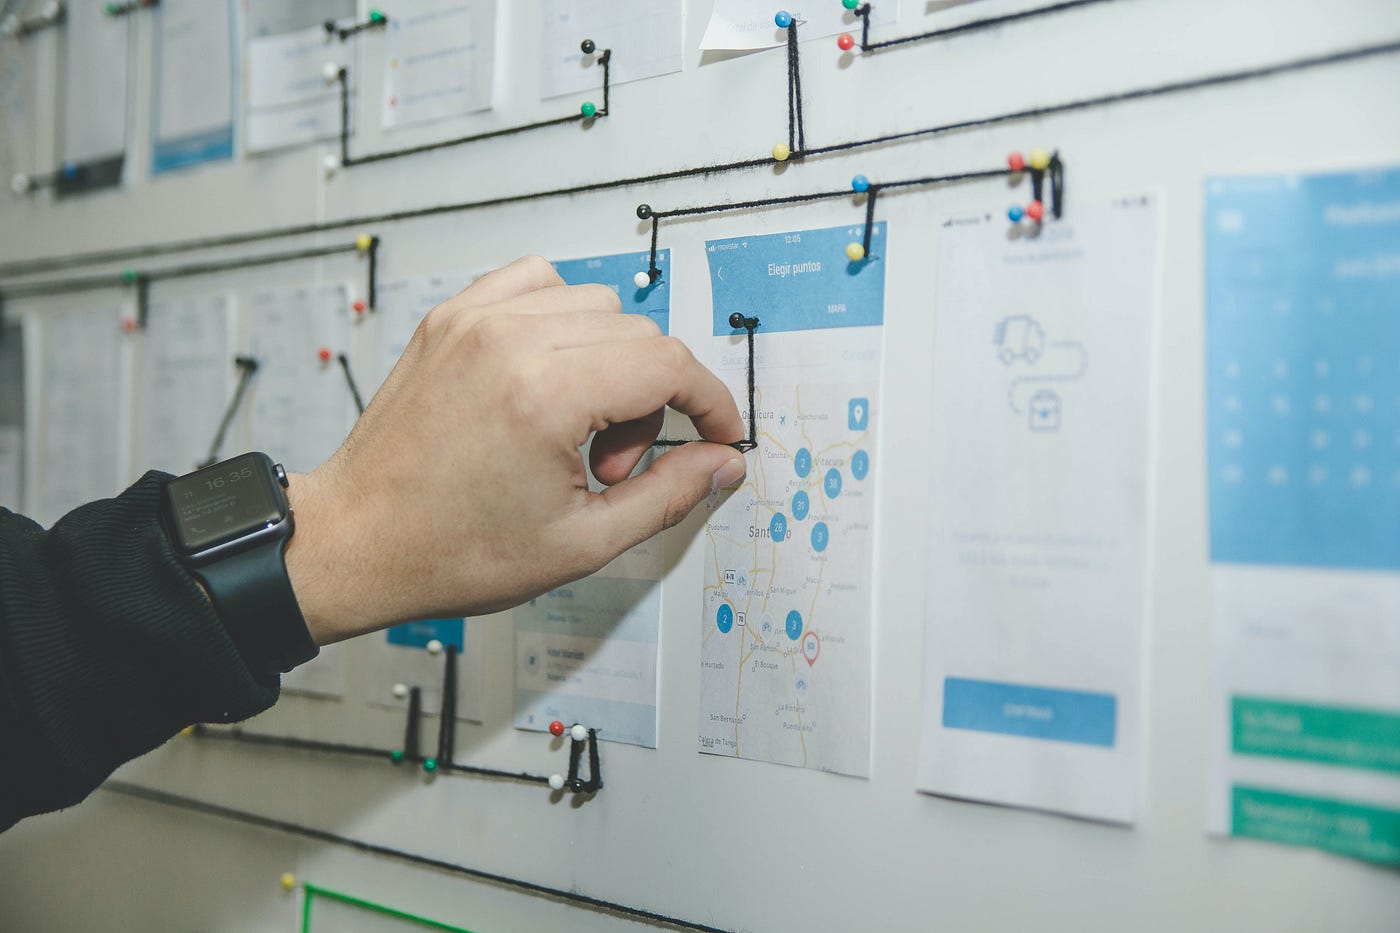
Unlike a user journey that explains the whole user experience from a bird's eye view, the user flow focuses on a task that the user wants to do and a goal he wants to achieve. It is a more narrow and focused view. We map the user experience for certain tasks and show all the user's steps to achieve his goal.
An example of this can be the process of logging into your product. To create a login flow, we need to fully comprehend both the happy path and the unhappy path (such as error cases) to figure out how to create a good user experience for this task.
In the past few years, I have been involved with creating some highly complex products containing many cases, user decisions, and edge cases, so I had to create with many user flows.
In some moments, I had problems explaining all the information to the team (and to myself also) in an easy way. So I started investing time figuring out how to do it better so it will be easy to explain the user flows in meetings, calls, slack messages, and design handoff.
In order to help you better understand this content, I would like to align some of the key aspects with this topic.
What is the difference between chart flow diagram wire flow and screen flow?
There are some common visual ways to explain user flow. The names can differ from one UX designer to another, but the concepts are the same in most cases.
Chart flow diagram
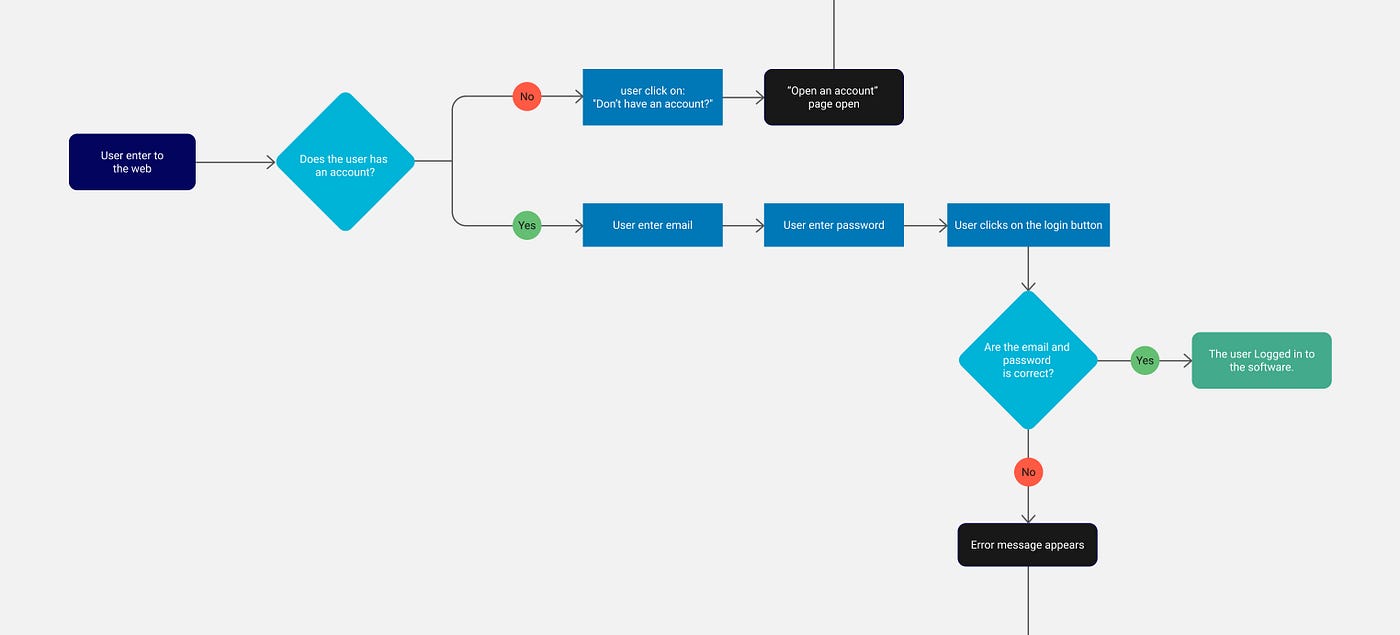
The Chart flow diagram is a technique to explain the user flow with all the user's decisions, including the edge cases and errors. The diagram shows the process the user goes through from a higher-level perspective to explain the flow, and it doesn't dive into the small details.
The diagram normally uses shapes to explain the user interaction. Each shape use to explain a different thing like
-Start point
-Action
-Decision
-Results
Wire flow (Low-fidelity)
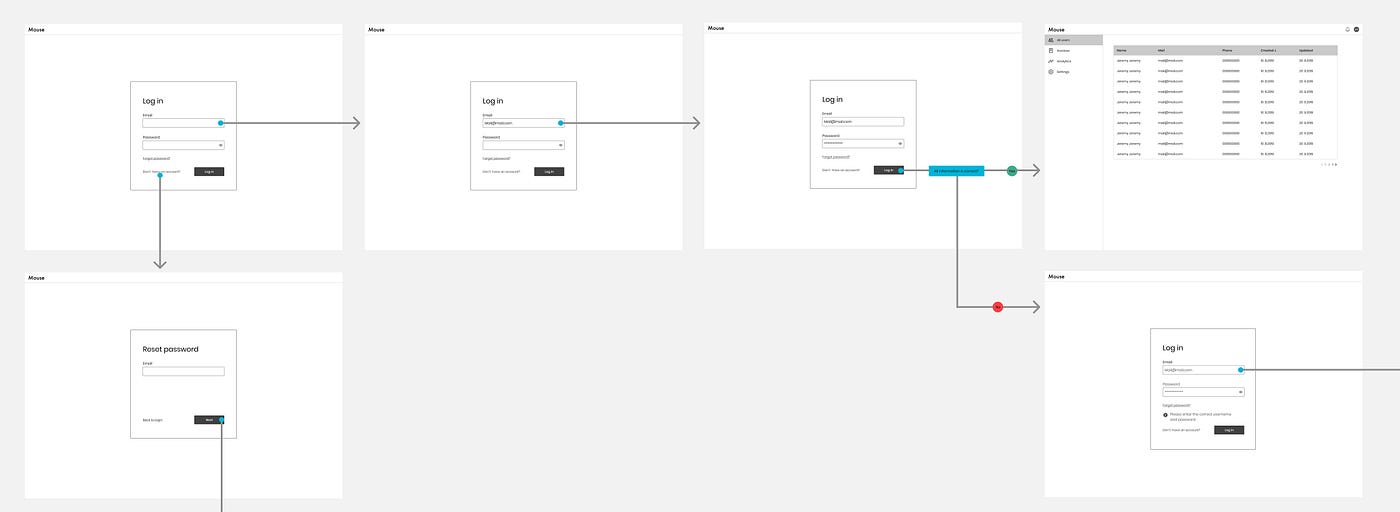
Wire flows are a series of wireframes that explain how a user interacts with an application and navigates through it, including all errors, decisions, and edge cases.
The wire flows give us detailed information about what the users do at any particular moment, such as when they click to go to another page or the moment they press a switch button. It is normally done with wireframes connected with lines, sometimes with little explanation.
Screen flow (Hi-fidelity)
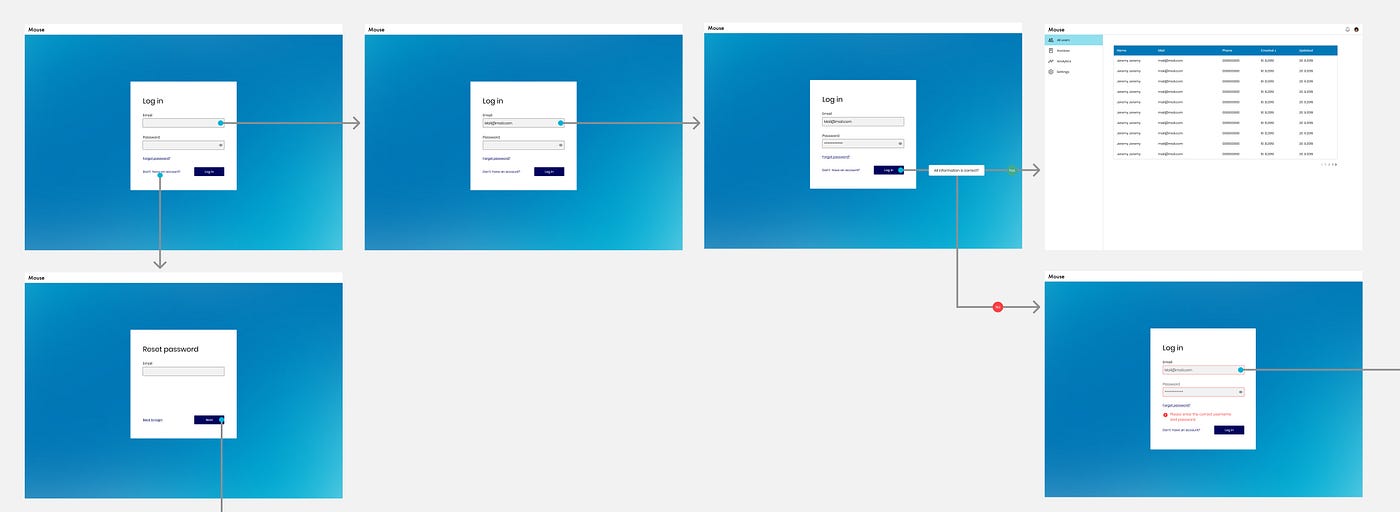
The screen flow is the same as wire flow, but it includes high-fidelity screens with all the visual details. This can be the starting point to create the high-fidelity prototype.
What is the difference between user flow and user task?
There are two ways to explain and create the user flow:
User flow
The user flow describes how users navigate through the various screens or pages of an application in order to complete a task, including all the decisions they need to make, errors, and edge cases.
Task flow
Task flow focuses on a single path. It can explain an error or edge case the user may encounter. They are more focused and show a straight-way path, usually without decision junctions.
You can notice that user flow and the user task are more or less the same things. The difference is that the task flow describes more cases. Actually, by combining some user tasks, we will have a user flow. You can think of it as a tree, the user flow is the whole tree, and the user task is a single bunch.
What is the problem with user flow?
There are two main perspectives that user flow can be problematic:
Time-consuming:
Building a user flow can be a really time-consuming task. For simple flow, there is no problem, but it starts to be more complex when we talk about flow with many cases.
A user flow diagram can be produced using the ready template in Miro (or another whiteboard application) or build in Figma or Sketch (some plugins help to do it). However, connecting all the shapes and tests to verify there are no errors takes a lot of time.
In the case of wire flow or screen flow, it can be more complex because besides connect the lines and test the flow, it is necessary to create the screens and add all the small details.
As you can see, we need to invest a lot of time to create a complete user flow. We need to invest a lot of effort to create all the diagrams (in the case of the user flow diagram) or all create and connect all the screens (in the case of wire flow Hi-fidelity user flow:) and we also need to review and test the user flow to ensure there are no errors.
One big picture that is difficult to understand
It does not matter if you create a flowchart diagram, a wire flow diagram, or a screen flow to represent a user flow. The difficulty lies in showing a comprehensive user flow in a way that is straightforward and easy to read.
Imagine the number of decisions users may make in a flow and how many errors and edge cases they may encounter.
You can often finish with a huge flow that will be very difficult for you and for your team to understand and follow. I always see designers who show huge flows in their portfolios, and they seem potent and impressive. But in reality, I don't see that as an effective means of communication.
A person's ability to calculate information when they see a huge diagram is like eating a whole sandwich in one bite.
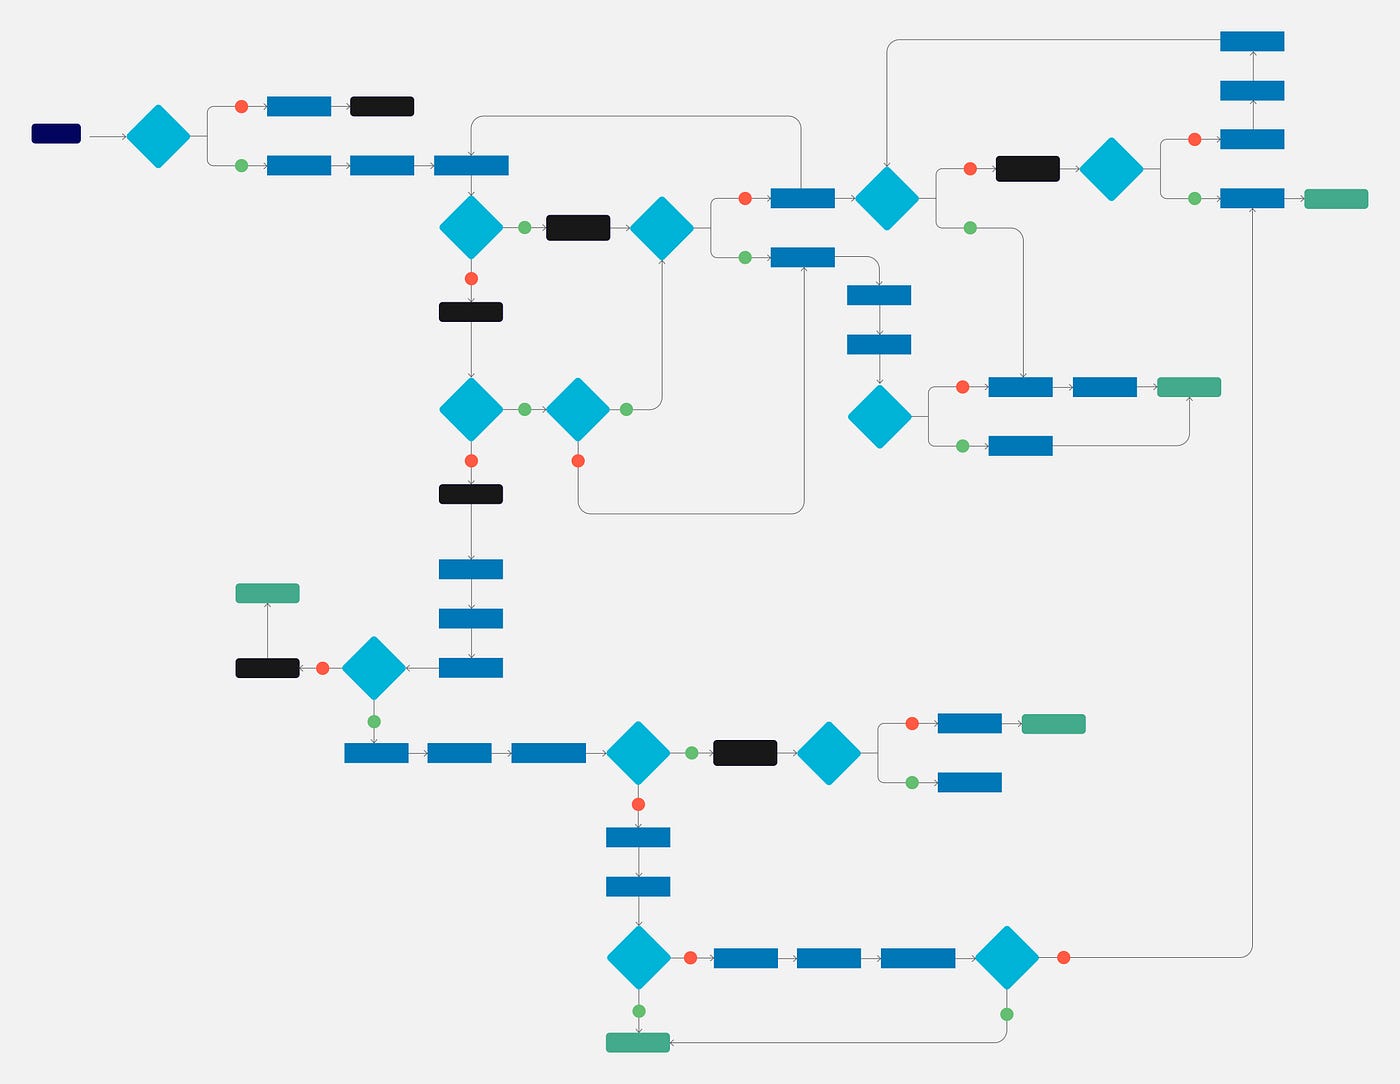
So imagine now that you found an edge case that you need to solve, and you want to quickly explain it to the developer (like in a slack message). How do you do it? As you see, it is not necessary to create a full user flow with all the small details only to explain one edge case.
Opening a Miro board and creating a diagram is time-consuming and in a case, you created the user flow and want to add this specific edge case, it can be a task that can consume a lot of effort,
Open the file, add the edge case, test again the flow, etc…
How to create user flow more effectively:
Here are some simple actions you can take to create in a more effective way user flow.
Please note that there is no right or wrong; you may take my suggestions and use them as-is, or you may tweak them to meet your needs.
The other point is that sometimes we can't escape, and we have to create large user flows to explain everything.
Your main objective should be to improve your effectiveness and communication within your product team.
Divide the user flow into small flows:
Break the flow down into smaller ones, such as Task flow.
You can divide it in that way:
-Happy paths
-Error paths
-Edge cases
When you divide it in that way, it is easy to understand the flow.
You can show it to the team and explain it to them in that way:
This is the Happy path, here are the error cases and here we have the edge cases.
It is always good to show the Happy path first, so all team members understand the simple cases and then show the more complex ones afterward.
Use text flow
I don't know if it has a common name, but I call it text flow. The main idea is to explain a flow with the text. To do it, you need to use the angle bracket sign (you can call it also chevron ) > so you can write the slow like that:
The user enters the website > the user enters his username and password > the user clicks on login > the user logged to the app.
As you can see, the angle bracket sign helps to explain the flow.
Using this method is really helpful to explain a flow rapidly, for example, in a slack message, when you want to write a flow to yourself quickly. Additionally, it is also an excellent way to explain edge cases.
In addition to all these uses when designing screens in Figma, I create this flow to explain what the user does.
Altho this technique seems very limited to one path. It is possible to add to it a condition. Look at the example below:
The user enters to the website > the user enters his username and password > the user clicks on login >
-If all the information is correct > the user logged to the app.
-If all the information is not correct > An error message appears.
As you can see, it is a little bit the way developers write the code. if-else :)
In my opinion, it is the most effective way to communicate flow. It is also easy to construct and simple to understand.
Use hand icon
Recently, I worked with a great designer who used this technique, which has inspired me to use it myself.
Often, we design the screens, but we do not have to create a prototype.
However, we need to understand the flow in an easy way.
The common practice is to write the screen name in the artboard name.
To make it clearer, you can add a hand icon that explains what the user does. This method makes it easy to scan through all the flow and comprehend it. Therefore, each team member can enter the file and understand it better (without asking any questions).

Sketch the user flow by hand
The user flows can all be sketched by hand if you need to work faster. You can always use a pencil and paper, but if you have a tablet, I really recommend you use it. The reason for this is that you can send it directly from the tablet to any member of your team, so taking a picture or scanning it isn't necessary.
Automate the creation process with programs
Imagine that you created a beautiful prototype to conduct usability testing to feel the product.
Now you want to show this flow to a team member. You don't need to build a flow from scratch. You can use plugins that create it automatically.
If you use Sketch, you can use UserFlows plugin.
Also, you can build a prototype with the Overflow tool (available for Sketch, Figma, and Adobe XD). It gives the option to create a prototype and export it as a flow.
Build with the developers the flow
It is highly recommended that you collaborate with the developers to create the user flow. This is one way of ensuring that all team members understand the overall flow through minimum documentation effort.
A bibliography for this article appears below:
- What Are User Flows In User Experience (UX) Design?
- How To Create A User Flow: A Step-By-Step Guide
- A UX designer's guide to user flows
- What is a User Flow — Everything You need to Know
- UX Design 101: Thinking in (user) flows
- Wireflows: A UX Deliverable for Workflows and Apps
I hope this guide will help you. Feel free to share it with your friends or team members, and if you have any questions, feel free to leave a comment.
How To Create User Flows
Source: https://bootcamp.uxdesign.cc/how-to-create-user-flows-in-an-easy-way-80ad394f5ad8
Posted by: presleralles1971.blogspot.com

0 Response to "How To Create User Flows"
Post a Comment